Send Emails using ASP.NET MVC
In this article we are going to explain the steps to implement sending of Email in the ASP.net MVC framework.
It is a very common and crucial option to send emails from applications to cater to the most common use case likes taking feedback from users, acknowledge goods and services purchased, user registration, forgot password, and many such scenarios.
In this article, we will cover the steps to quickly enable the feature of sending emails from Asp.net MVC application.
We will be sending emails using SMTP (Simple Mail Transfer Protocol) using the .NET framework library found in System.Net.Mail namespace that includes key classes for creating messages, providing SMTP details, and sending an email. In this article, we will use the free service provided by Google’s Gmail system for sending emails from our Application.
Let’s get started!!!
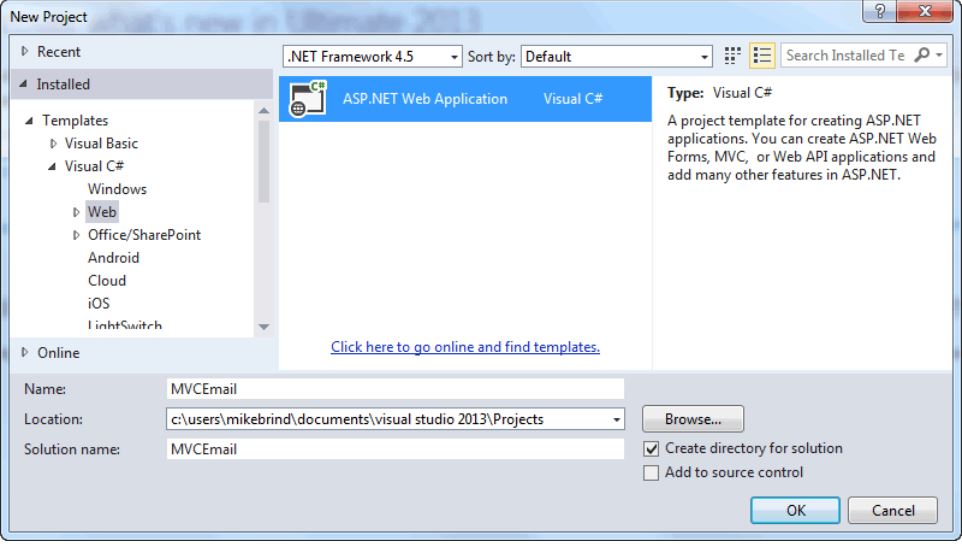
Step 1
Open Visual Studio 2015 and from the New Project Link or File -> New -> Project, create a new project, select Asp.NET Web Application from the C# templates and click OK.
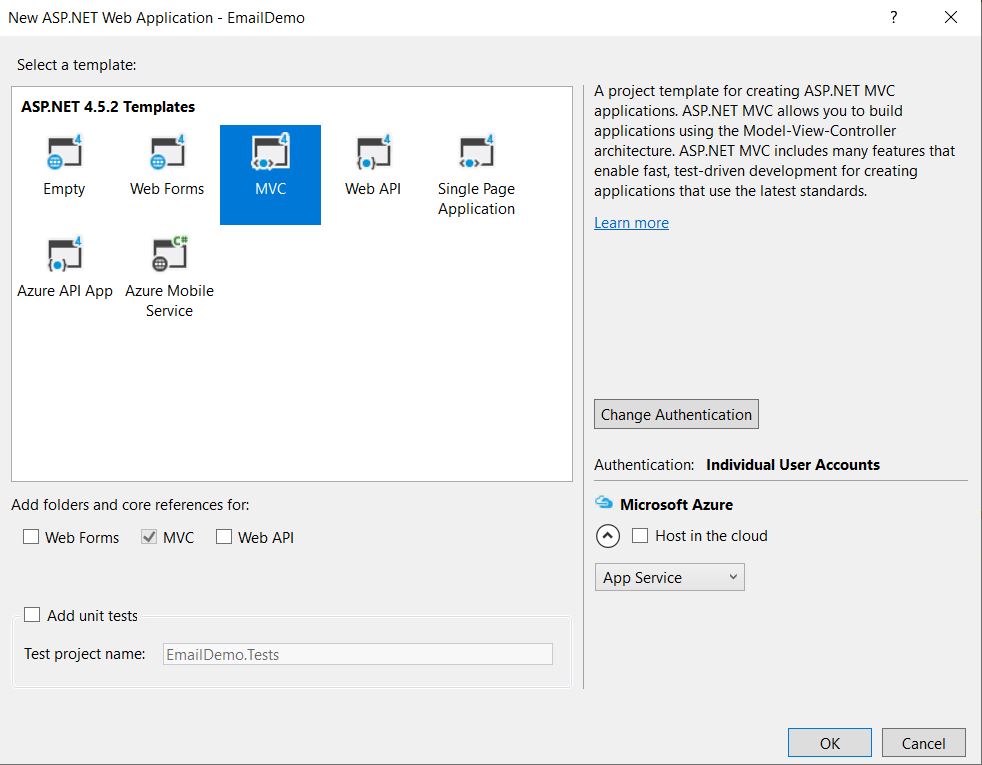
Step 2
Choose MVC, and keep the remaining setting as it is
Step 3
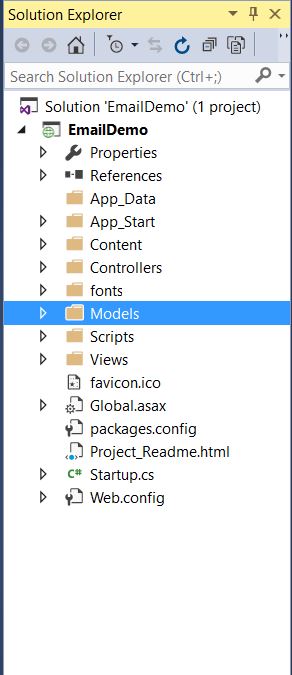
You will see the below folder structure created automatically by Visual Studio 2015. We proceed by creating class by Right-clicking on Models folder, select Add and click Class. Name the class as “EmailDataModel.cs”. (Our name as per your requirement or naming conviction you follow )
Step 4
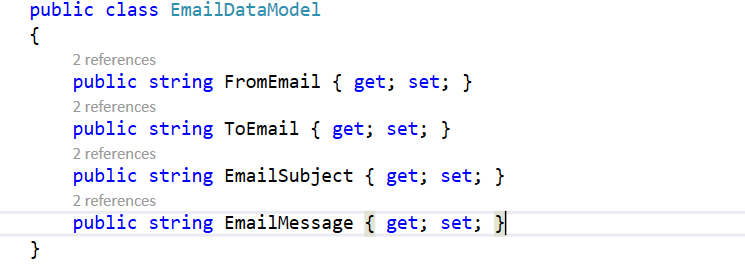
Right the following code in EmailDataModel class
Step 5
Now we will create a controller that will manage the flow of execution. We will create a method in the controller that will actually take the data from Model class and send emails.
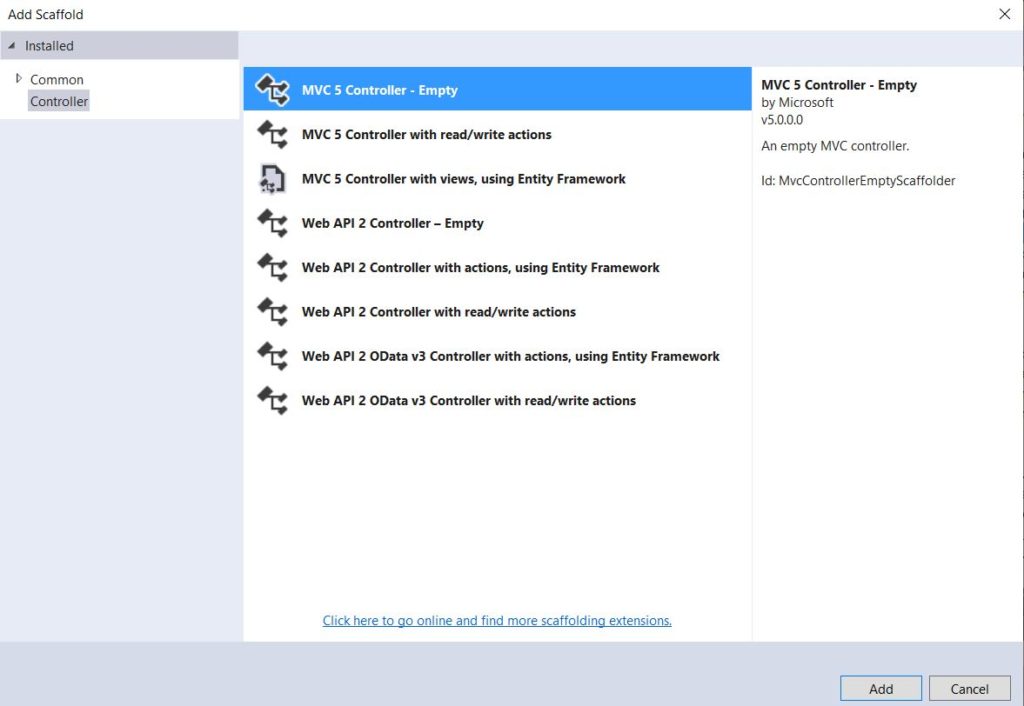
Now let's create controller class by right clicking on the Controllers folder and select Add -> Controller and from the dialog box presented select – “MVC 5 Controller – Empty” and enter the controller name as “SendEmail”. Refer screenshot below
Step 6
In the controllers class created as “SendEmail”, we will create ActionResult that will take EmailDataModel as Parameter to fetch the data entered by users and send email using .NET class System.Net.Mail.
The Send Email Action result method performs the following the following
- Checks if the Action is POST – ( user has filled in all required information and clicked on Send Email
- Validates the Model Data and Initiates the Message class to Pass the Email Address, Subject, and Message
- Next it will instantiate the SMTP class and Passing in the Gmail Credentials. For demo purpose I have added the SMTP details in Web config so that it can be changed anytime however if you wish to store the details in Web config then please encrypt and decrypt after fetching in the controller class
- On success, we set the ViewBag Message and display the same in View (UI) for the user to notify that email is sent successfully.
using System.Web.Mvc;
using System.Net.Mail;
using System.Configuration;
using EmailDemo.Models;
using System;

public ActionResult SendEmail(EmailDataModel EmailModel)
{
    ModelState.AddModelError("", "");
    if (Request.HttpMethod == "POST")
        {
            //Validate for All Required Fields
            if ((EmailModel.FromEmail == null))
            {
                ModelState.AddModelError("", "Error!! From Email Address Required  ");
                return View(EmailModel);
            }

            if ((EmailModel.ToEmail == null))
            {
                ModelState.AddModelError("", "Error!! To Email Address Required  ");
                return View(EmailModel);
            }

            if ((EmailModel.EmailSubject == null))
            {
                ModelState.AddModelError("", "Error!! Subject Required for Sending Email  ");
                return View(EmailModel);
            }

            if ((EmailModel.EmailMessage == null))
            {
                ModelState.AddModelError("", "Error!! Email Message Required ");
                return View(EmailModel);
            }

            MailMessage message = new MailMessage();

            message.From = new MailAddress(EmailModel.FromEmail.ToString());
            message.To.Add(EmailModel.ToEmail.ToString());
            message.Subject = EmailModel.EmailSubject.ToString();
            message.IsBodyHtml = true;
            message.Body = EmailModel.EmailMessage.ToString();

            try
            {
                SmtpClient smtpClient = new SmtpClient();
                smtpClient.EnableSsl = true;
                smtpClient.Credentials = new System.Net.NetworkCredential(ConfigurationManager.AppSettings["GAccount"].ToString().Trim(),
                    ConfigurationManager.AppSettings["GPassword"].ToString().Trim());

                smtpClient.Host = ConfigurationManager.AppSettings["Host"].ToString();
                smtpClient.Port = Convert.ToInt32(ConfigurationManager.AppSettings["Port"]);
                smtpClient.Send(message);

                //Success
                ViewBag.Message = "Email Sent Successfully";
            }
            catch (Exception ex)
            {
                //Error occured show it to users
                ViewBag.Message = ex.Message.ToString();
            }
        }

        //Returns the view Back
        return View(EmailModel);
}
Step 7
Now its time to create the View page that is ultimately displayed to the customer to fill in the details before sending the email.
In the controller class, Right-click on the SendEmail ActionResult method and select Add View. Keep the setting as it is and click Add
Once done, you will see SendEmail View created under the View Folder.
Step 8
Replace the following code in the SendEmail View
@using EmailDemo.Models
@model EmailDataModel
@{
ViewBag.Title = "Send Email";
Layout = "~/Views/Shared/_Layout.cshtml";
}
<h2>@ViewBag.Title.</h2>
@using (Html.BeginForm())
{
@Html.AntiForgeryToken()
@Html.ValidationSummary(true, "", new { @class = "text-danger" })
if (@ViewBag.Message != null)
{
@ViewBag.Message
}
<hr />
<div class="row">
<div class="form-group">
@Html.Label("From", new { @class = "col-md-2 control-label" })
<div class="col-md-10">
@Html.TextBoxFor(m => m.FromEmail, new { @class = "form-control" })
@Html.ValidationMessageFor(m => m.FromEmail)
</div>
</div>
</div>
<br />
<div class="row">
<div class="form-group">
@Html.Label("To", new { @class = "col-md-2 control-label" })
<div class="col-md-10">
@Html.TextBoxFor(m => m.ToEmail, new { @class = "form-control" })
@Html.ValidationMessageFor(m => m.ToEmail)
</div>
</div>
</div>
<br />
<div class="row">
<div class="form-group">
@Html.Label("Subject", new { @class = "col-md-2 control-label" })
<div class="col-md-10">
@Html.TextAreaFor(m => m.EmailSubject, new { @class = "form-control" })
@Html.ValidationMessageFor(m => m.EmailSubject)
</div>
</div>
</div>
<br />
<div class="row">
<div class="form-group">
@Html.Label("Message", new { @class = "col-md-2 control-label" })
<div class="col-md-10">
@Html.TextAreaFor(m => m.EmailMessage, new { @class = "form-control" })
@Html.ValidationMessageFor(m => m.EmailMessage)
</div>
</div>
</div>
<br />
<div class="row">
<div class="form-group">
<div class="col-md-offset-2 col-md-10">
<input type="submit" class="btn btn-default" value="Send Email" />
</div>
</div>
</div>
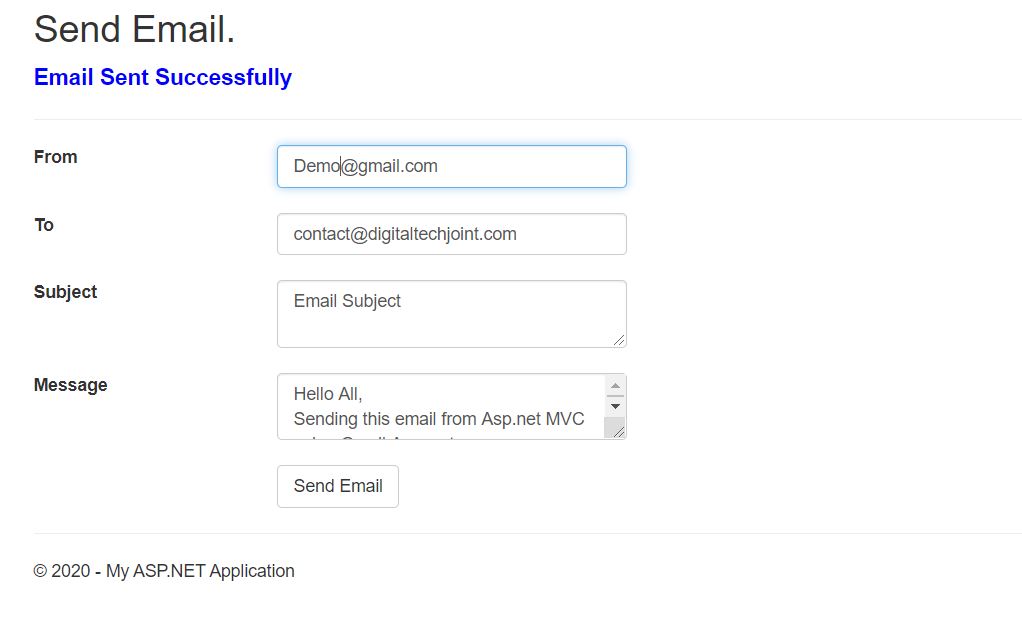
}The view code will produce the following output of design for SendEmail View
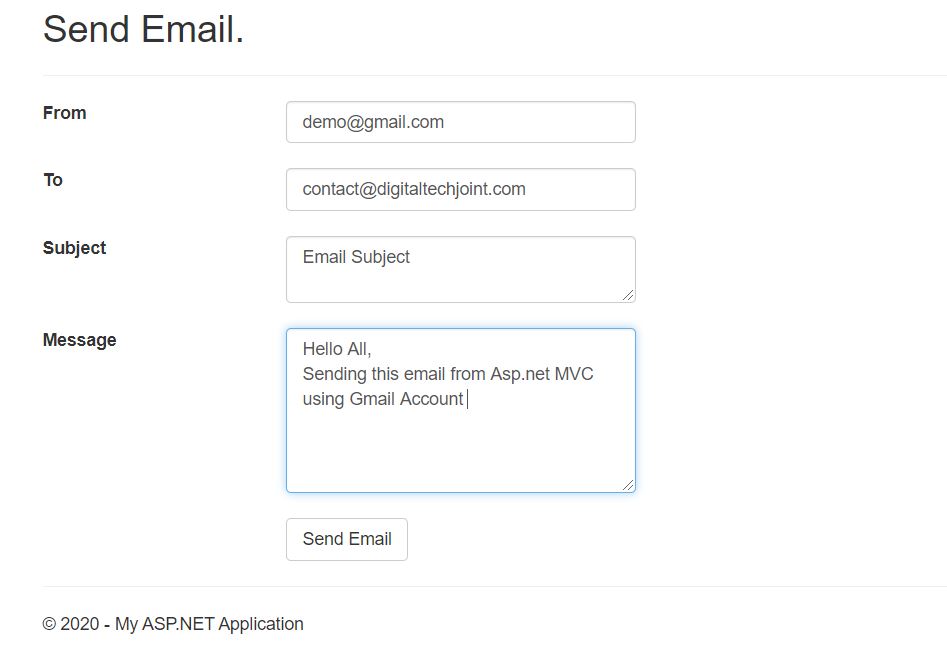
The Application menu bar displayed on the top menu is created by default by the MVC template and the Send Email link is added by including the single line of code in _Layout.cshtml file found in View -> Shared Folder
Include the below line in _Layout.cshtml
<li>@Html.ActionLink("Send Email", "SendEmail", "SendEmail")</li>Step 9
Now we add the necessary parameters in the web.config file. As mentioned, we have included the following Keys under the AppSetting section in Web.config file
<add key="Host" value="smtp.gmail.com" />
<add key="Port" value="587" />
<add key="GAccount" value="[Mention Your Gmail Address" />
<add key="GPassword" value="[Gmail Password]" />
Step 10
We have added all necessary components and coded for sending email from Asp.net MVC using Gmail Account. Build the solution and Run.
And here is the success message displayed once the email is sent successfully through Gmail credentials using SMTP mode
Note:- The sending of email from Gmail Credentials using SMTP will only work if you have turned off the “Less secure app access”. If this option is not turned off then google will restrict sending an email using your .Net code.
In order to access the setting, log-in to your Gmail account, click setting, and select Security. In security section, select the option “Less secure app access” and turn off the Allow less secure apps.
Conclusion
We have covered the basic steps for sending emails from Asp.net using the MVC framework. You can explore the other properties available in System.Net.Mail libraries like setting the message format to Plain or HTML, attaching a document, and restricting to SSL mode of sending email and many other such features & property.
Hope you liked the article and please do subscribe to receive such articles posted on Digital TechJoint and click here to subscribe to our YouTube channel.
Thanks for Visiting Digital TechJoint